
REVIEW · CASCADE PEAKS & VOLCANO TRIPS
Mount Baker Climb Tour from Washington
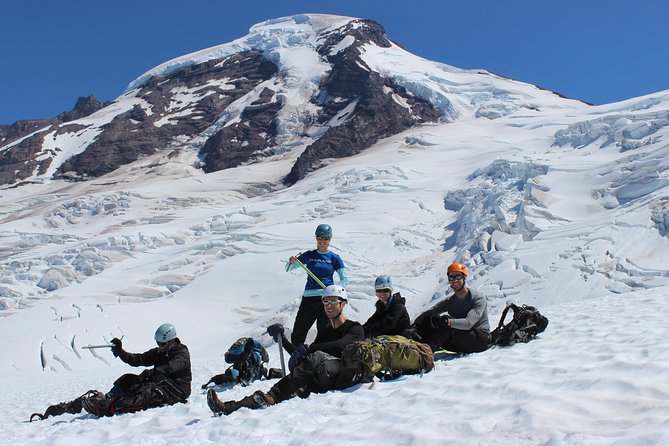
Glacier training comes first, then the summit push. On this 3-day Mount Baker climb from Seattle, I like that you get professional guide leadership plus all permits and climbing gear included for a capped group of 15. You’re not just being led up an ice route—you’re taught how to move as a rope team on real glacier terrain.
The main drawback to plan for: it’s not a guaranteed summit day. Weather can shift your summit timing, and meals aren’t included, so you’ll need to manage food and hot drink plans yourself (even if stoves and cook kits are provided).
In This Review
- Key Things That Make This Mount Baker Tour Work
- Meeting in Seattle and Getting Set Up for Real Glacier Travel
- Easton Glacier or Coleman-Demming: What the Route Demands
- Training Before You Summit: The Glacier Skills That Actually Matter
- Summit Day Plans and Why Weather Can Shift Everything
- Cold-Weather Camping, Leave No Trace, and Staying Efficient
- What’s Included (and What You’ll Still Need to Plan for)
- Included
- Not included
- Group Size, Safety Culture, and How the Guide Team Works
- Who This Mount Baker Climb Is Best For
- Should You Book This Mount Baker 3-Day Climb?
- FAQ
- How long is the Mount Baker climb tour?
- Where do you meet in Seattle, and what time?
- Which route will you take up Mount Baker?
- What’s included in the price?
- Do I need a certain fitness level?
- What happens if I cancel or if the tour doesn’t meet its minimum?
Key Things That Make This Mount Baker Tour Work
- Small group size (max 15): more hands-on coaching and tighter teamwork.
- Permits covered: less guesswork and fewer last-minute hurdles.
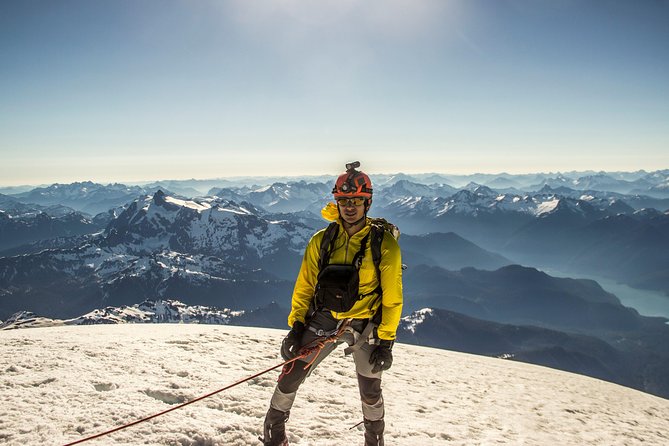
- Easton Glacier or Coleman-Demming route: true glacier travel with icefall/serac navigation and crevasse awareness.
- Real instruction before the rope team: ice axe arrest, crampons, knots, rope management.
- Gear check and packing help: they help you avoid bringing everything… or forgetting what matters.
- Weather-flexible plan: summit day may move to day two, with a calmer hike out on day three.
Meeting in Seattle and Getting Set Up for Real Glacier Travel
This tour starts in the Seattle area with a morning meet-up around 8:00 AM at a convenient Park and Ride. The listed start time is 7:30 AM, so expect a quick check-in and a brief prep before you roll out. If you’re coming from out of town, plan on coordinating carpools, because transportation isn’t included (though the provider can help).
The best part of this kind of Mount Baker trip is early clarity. Before you ever step onto the glacier, you get a pre-trip planning/information session on packing & gear and a gear check at least three days prior. That matters because on ice, a wrong item isn’t just annoying—it can change how safe you are.
Also, you’ll be traveling with a mobile ticket and an English-speaking team, which keeps things straightforward if you’re coming in from other states or countries.
Volcanoes and high passes, more Cascade day trips
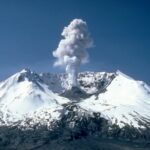
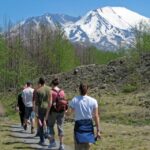

Easton Glacier or Coleman-Demming: What the Route Demands
Mount Baker is famous, and this tour goes after the heart of why: serious glacier travel. You’ll climb via either the Easton Glacier route or the Coleman-Demming route, and the emphasis is on route-finding through icefalls, seracs, and around large crevasses.
Here’s what that means in practical terms. You’re not just looking at a snowy slope and guessing your line. The guide team’s job is to help you read changing terrain, recognize hazards, and keep the group moving efficiently even when conditions make everything feel the same color.
You’re also in the Mount Baker–Snoqualmie National Forest area, with an outdoor classroom feel. The program highlights mountain streams, blue glaciers, and wide views extending toward the Puget Sound—great when visibility is decent, and a reminder that the glacier is alive and shifting.
One more smart note: the tour also trains you to do hazard assessment as you go. That’s a core difference between hiking “near ice” and traveling safely on ice.
Training Before You Summit: The Glacier Skills That Actually Matter
This is where the experience earns its keep. The climb is meant for people who are ready to move from hiking into mountaineering basics, and you’ll practice skills that keep rope teams functional and safe.
Before summiting, you’ll learn glacier travel foundations such as:
- Ice axe arrest and self-arrest technique
- Crampon use and walking with crampons (with and without them)
- How to attach to a rope as a rope team member
- Climbing knots
- Glacier travel skills and rope management
- Navigation and route finding
- Cold weather camping skills
- Leave No Trace habits
I especially like that the guide team treats this like training, not a lecture. Crampon placement, footwork, and arrest technique are physical skills. You want reps, corrections, and a chance to ask questions early—before you’re tired, cold, and operating on low patience.
The program also includes packing strategy. In other words, you’re taught the balance between packing too much and leaving behind something critical. On a Mount Baker climb, that can be the difference between moving well and feeling weighed down all day.
And yes, you’ll be out there with real glacier features—so you can connect the skills you practiced to what’s actually happening on your route: crevasses, icy slopes, and serac terrain that demands good judgment.
Summit Day Plans and Why Weather Can Shift Everything
A key promise in the tour info is weather flexibility. Depending on conditions, the summit attempt can move to the second day, with sleep-in on the third day for a more relaxed hike out. The provider also notes other changes could happen due to bad weather, unsafe route conditions, or factors beyond their control.
So what should you do with that information? Don’t build your schedule around a single, fixed summit moment. Instead, treat this as a climb window where the goal is safe progress and skill-building—even if the weather forces a turnaround.
That’s not just theory. Past participant feedback highlights guides prioritizing safety when visibility or conditions worsen, and then using the extra time on mountain to practice valuable skills. In practical terms, you might still walk away having learned a lot about rope travel and glacier decision-making, even if weather trims the summit attempt.
You’ll also notice that this approach is consistent across guides—names that have shown up include Josh, Simon, Andrew, Sam, Drew, Caleb, Bailey, and Sandeep (owner/operator), with Jake doing coordination and communication. Different personalities, same theme: keep the team safe, keep instruction moving, and don’t waste time on the mountain.
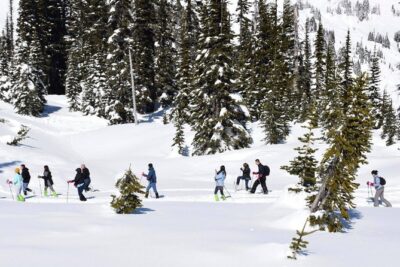
Cold-Weather Camping, Leave No Trace, and Staying Efficient
Even if your goal is the summit, you’re also signing up for cold-weather fundamentals. The tour specifically lists cold weather camping skills and Leave No Trace.
Why does that matter for you? Because the less time you spend guessing at camp, the more time you have for safe movement the next day. Camping skills cover how to handle the cold and how to operate with intention, not panic.
Leave No Trace also isn’t just moralizing—it’s practical. On a glacier route and in national forest terrain, you want to leave the environment as you found it, and you want your camp workflow to stay clean and organized. That’s part of how guides keep the group running smoothly with fewer mistakes.
And because the tour includes tents, stoves/cook kits, and group climbing equipment, you’re not scrambling to invent camp systems at the last minute. You’ll still need to manage your own food choices, but the basic shelter and cooking setup are covered.
What’s Included (and What You’ll Still Need to Plan for)
This is one of the clearest value parts of the tour. The included list covers the items that typically cost money or cause stress on a mountain trip.
Included
- All permits
- Stoves/Cook Kits
- Tents
- Group climbing equipment
- Guide services
- Pre-trip planning/information session
- Mountaineering and outdoor safety skill instruction
Not included
- Transportation
- All meals, hot drinks, or snacks
- Gratuities for guides
For value, think about what’s missing and what’s covered. If you were doing this on your own, the hard-to-quote costs are often permits, logistics, and group gear. Here, permits are covered, and you’re supplied with tents and group equipment—so you’re paying mostly for guidance, instruction, and the mountain support system.
What you’ll need to plan for is simpler but important: food and hot drinks. The tour gives you stoves and cook kits, so you can eat like a person. But you’ll need to bring meals/snacks yourself, and you should expect cold conditions where calories and warm drinks can make a big difference in how you feel on summit day.
Group Size, Safety Culture, and How the Guide Team Works
The group cap of 15 participants is more than a comfort detail. On glacier routes, smaller groups help keep rope teams manageable and reduce the time spent waiting at transitions. It also makes it easier for guides to monitor pacing, crampon technique, rope behavior, and fatigue.
Safety culture is threaded through the whole program: hazard assessment, route-finding practice, and rope management instruction. The skill list also points to why this matters. If you don’t know ice axe positions, how to self-arrest, or how to attach into a rope team correctly, you don’t have a safety net—you just have hope.
Past experience notes reinforce that guides make safety calls when conditions worsen and communicate expectations clearly. That includes deciding when to turn around, when visibility makes progress unsafe, and how to keep the day productive with additional drills.
In short: this tour is set up so you learn how to operate in a group on technical ice, not just how to survive your first summit attempt.
Who This Mount Baker Climb Is Best For
This climb is aimed at people who are ready to start mountaineering training. The description says it’s meant for experienced hikers looking to make that step, and the booking info adds you should have moderate physical fitness.
This is a strong fit if:
- You’ve hiked a lot, but you haven’t spent time on glacier travel with rope teams.
- You want a guided path to learn ice axe arrest, crampons, and rope management.
- You prefer small groups and structured training over a vague “good luck” approach.
You might reconsider if:
- You only want a casual hike experience.
- You aren’t willing to plan for cold nights and bring your own food.
- Weather variability would derail your trip goals. (The plan adjusts, but the mountain decides the final schedule.)
Should You Book This Mount Baker 3-Day Climb?
If your goal is to learn glacier travel skills with real instruction, this tour is a smart bet. The big value points are permits covered, group equipment and tents included, and a guide-led curriculum that teaches how to move safely as a rope team.
I’d book if you’re ready for cold conditions, you can handle the idea of a weather-shifted summit attempt, and you’re happy to show up prepared for skills practice—not just pictures. Bring your own meals and hot drinks planning into your budget, and treat summit day as part of a wider learning climb.
If you want a Mount Baker experience that blends technical training with the chance to try for the summit (with a real safety mindset), this is exactly the kind of tour that fits.
FAQ
How long is the Mount Baker climb tour?
The tour runs for about 3 days.
Where do you meet in Seattle, and what time?
You meet at a convenient Park and Ride in the Seattle area, with pickup at 8:00 AM. The start time is listed as 7:30 AM, so plan to be ready early.
Which route will you take up Mount Baker?
The climb uses either the Easton Glacier route or the Coleman-Demming route, depending on conditions.
What’s included in the price?
The price includes all permits, guide services, tents, stoves/cook kits, and group climbing equipment, plus a pre-trip planning/information session on packing and gear.
Do I need a certain fitness level?
The info says you should have moderate physical fitness.
What happens if I cancel or if the tour doesn’t meet its minimum?
This experience is non-refundable and can’t be changed for any reason. If the tour is canceled because a minimum number of travelers isn’t met, you’ll be offered a different date/experience or a full refund.
Up Into the Cascades
- Mt. St. Helens National Monument from Seattle: All-Inclusive Small-Group Tour
★ 5.0 · 129 reviews - Luxury Leavenworth Day Trip through the Cascade Mountains
★ 5.0 · 61 reviews - Small-group Mt. St. Helen National Park Tour from Seattle in SUV
★ 4.0 · 11 reviews - Seattle: Mt. St. Helens National Monument Small Group Tour
★ 4.7 · 9 reviews - Leavenworth and North Cascades Sightseeing Tour
★ 4.0 · 9 reviews - Private Cascade Mountains and Waterfalls Tour from Seattle
★ 5.0 · 6 reviews
Just Added: Fresh Seattle Tour Reviews
- Viator Exclusive – Half Day Mountain Bike Tour from Seattle★ 5.0 · 3 reviews
- Break It and Make It: A Glass Fusing Session in Everett★ 4.5 · 3 reviews
- Bainbridge Island Discovery and Wine Tour★ 5.0 · 3 reviews
- Alki Lighthouse Sea Kayak Tour★ 5.0 · 3 reviews
- Sail Bainbridge Island & Seattle Waters – Classic Sailboat★ 5.0 · 3 reviews
- City Sightseeing Seattle: HOHO Bus Tour + Locks Cruise★ 4.3 · 3 reviews
Cascade Peaks & Volcano Trips, compared.
 ★ 5.0Mt. St. Helens National Monument from Seattle: All-Inclusive Small-Group TourFrom $344129 reviews
 ★ 5.0Luxury Leavenworth Day Trip through the Cascade MountainsFrom $35261 reviews
 ★ 4.0Small-group Mt. St. Helen National Park Tour from Seattle in SUVFrom $37511 reviews
 ★ 4.0Leavenworth and North Cascades Sightseeing TourFrom $1259 reviews
 ★ 4.7Mt. St. Helens National Monument Small Group TourFrom $3269 reviews
 ★ 3.0From Seattle – Enchanting Mt Baker and Cascades Tour in SUVFrom $3956 reviews
 ★ 5.0Private Cascade Mountains and Waterfalls Tour from SeattleFrom $3526 reviews
 ★ 5.0From Seattle: Mt Saint Helen TourFrom $2855 reviews
Browse the lists this tour appears in